 |
| 3rd May - This shows the tedious task of making true/plumb/level walls for the shower. For the back wall I needed to make up these interesting shaped studs to go against the bow-shaped wall. Now that the bus is level i can actually use a level. |
 |
| May 5th - Severe winds crumpled my outdoor workshop. This is the second Gazebo that has been destroyed by weather. I won't be getting another!!!! |
 |
| The focus will be on the back section, so the front section will be the workshop! |
 |
| Shower base glued down level |
 |
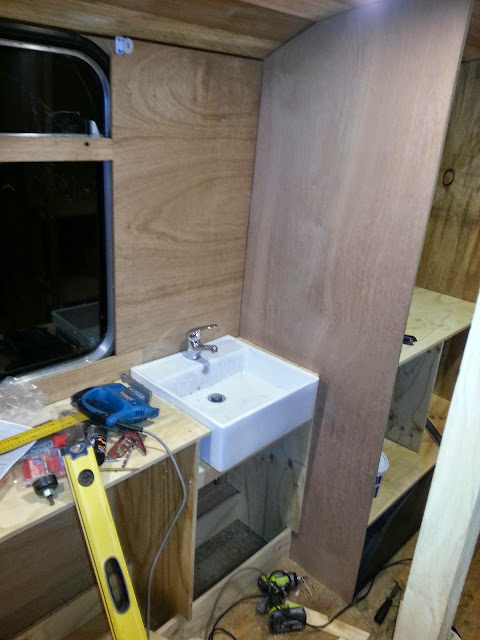
| Vanity basin set into bathroom bench |
 |
| Shower walls clad with Villa board. Below is a walk through video of where the bus is up to as of 13th May 2015. |
 |
18th May - Father-in-law varnishing the bed frame. For all the oiling and varnishing we are using products from a company called Livos. Livos manufactures a large range of environmentally sustainable products. Their products are made from natural plant-based materials, contribute no greenhouse emissions, and are free of harmful chemicals.
For the Floor, Ceiling and Trims we are using:
For the walls we will use a white washed:
|
 |
| Rather than adding wooden beading on the joins I used a dark brown 'No More Gaps'. So to make it neat, i taped it up. |
 |
| Father-in-law glueing on the hardwood ply to the wardrobes. |
 |
| Shower plumbing in place and I used a 2 pack marine wood sealer on the floor near the shower and the ceiling above. We didn't want to bother with tiles or vinly for a wet area so this will do the trick. |
 |
| Yet another beautiful sunset. |
 |
| Sunset view from the rear hatch behind our bed |
 |
| 23rd May - My nephew and niece helping to punch and putty the floor board nails. |
 |
| 26th May - Foreman Huddy checking the shower walls! |

No comments:
Post a Comment