Friday 27 March 2015

11. Outside the bus - getting it level

The Bus sits on a fairly damp part of the paddock so it was necessary to put a gravel road base down. After a year on the grass the bus had sunken into its wheel ruts and needed a bit of help from the tractor to move it. 
Hudson helped with the tractor work!
We will leave the eastern side as grass so that we can create a garden later on.
Here we have most of the top soil off ready for the gravel.
There were a few soft patches under the topsoil so the aim was to direct water off either side of where the bus will sit.
The first few loads on and getting spread out. Scalp gravel was put down under 40mm road base. 
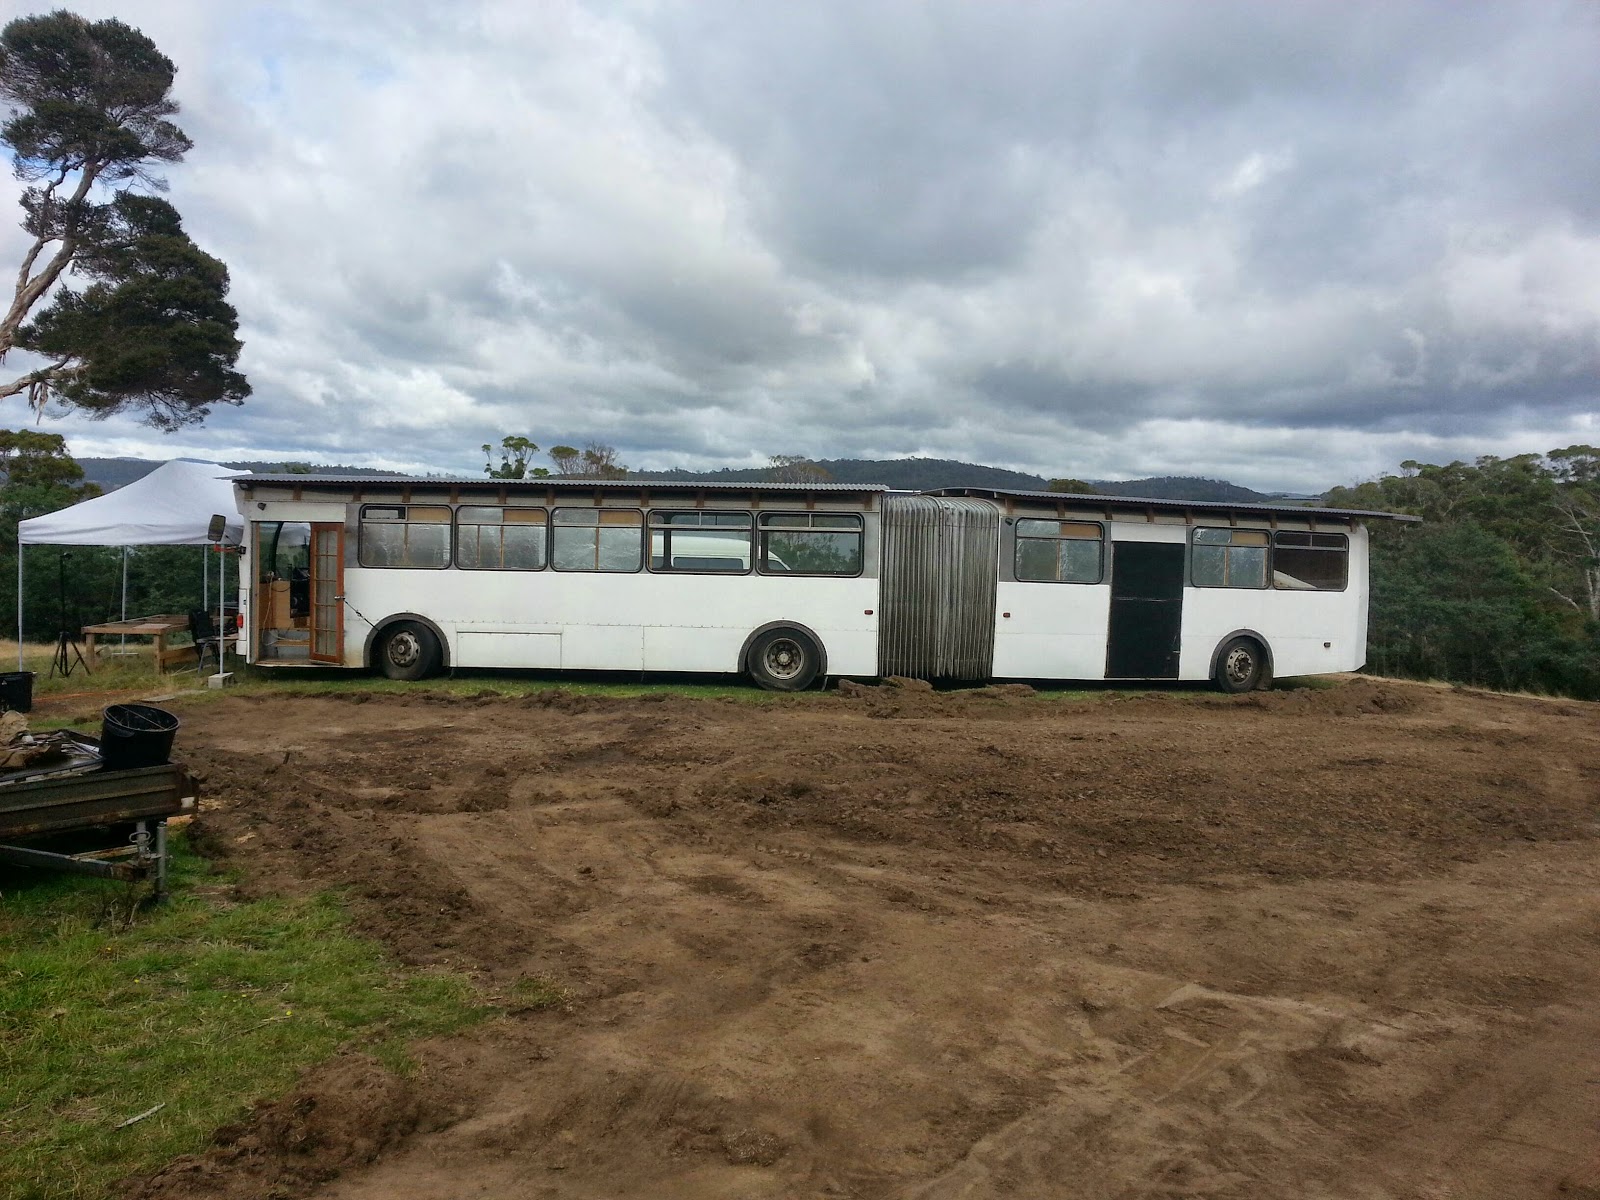
1st April 2015 -  bus is sitting on  a solid base now. Next it will be chocked up onto concrete pads and levelled.
1st May - Putting the concrete pads under the bus ready to jack it up level.
Rob and I getting things in place ready to jack the back section up level.
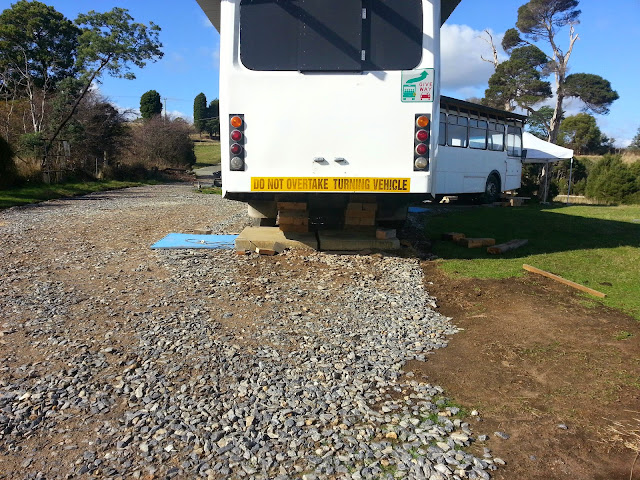
I hired a 10 tonne jack to do the job. This was slow going as it only lifted 10cm at a time so there was a lot of chocking and lifting going on!!!! Here I am using a 3 tonne trolley jack that was much faster but slightly under powered! I used Macrocarpa sleepers stacked up like Jenga blocks to sit the bus on. This worked well and the bus is stable and level now.

Friday 20 March 2015

10. Fitting out the rear section - wardrobes, walls, storage drawers etc.

Cheap 16mm ply was used to construct the wardrobes.
These sit on the rear wheel arches.
Hudson loves playing with the light dimmer.
I machined some 45mm x 45mm Macrocarpa pine to construct the internal walls. This is the start of the wall frame between Hudson's room and the toilet.
At this stage the bus isn't level so it was a bit tricky sighting walls vertical and squaring it all up.
The wall behind the shower is not straight. It bows outward like the rest of the bus walls. So I had to make up some battens to make it straight. I bought a 2nd hand Marbletrend 900mm x 900mm shower base and screen off Gumtree.
The rear section is beginning to take shape. Framing up to the ceiling was a challenge its curved shape. Its great to be able to see the defined spaces.
I used 6mm and 4mm hardwood ply to skin the internal walls.
We decided that we will focus on getting the rear section of the bus done completely first, move in, and then complete the front section.
The rear section has Hudson's room, storage, toilet, shower, wardrobes, master bedroom and more storage under the bed. So this will enable us to be comfortable. there will be a door between each section so I can continue to work on the front section. 

Wednesday 11 March 2015

9. Fire escape hatch, lift up bed & lights

24th February - The push-out fire escape was too flimsy and would not have been the best behind our bedhead. So I popped it out and decided to frame up a small fire escape hatch.
The Bed became a work in progress. I had a general idea of how i wanted it to work but it evolved as i went along. This is the main frame that the bed will hinge off.
Em hard at work dressing some timber for the bed frame.
5th March - Bed idea complete
There will be storage drawers either side underneath and gas struts to make lifting easier.
Here is my way of making a template for lining the walls up to the curved roof. I clamped some MDF up against the lowest point of the curved roof and measured each point and marked a mirror image off the top edge. It wasn't a perfect template but was a good starting point for using throughout the bus for wall patricians and lining etc.
10th March - Lights and power points are hooked up and working well. Most have dimmers on them.
Continuing with the escape hatch. This rear section is all molded fibreglass and required a fair amount of time spent lining it out and packing out sections to make it flush.
The escape hatch is behind a sliding piece of ply.
These are the Downlights we chose to use. LED lights use very little power and put out an amazing amount of light. The front kitchen section and the bathroom area don't have dimmers but everywhere else is dimmable. 
We have 20 downlight throughout the bus which means our lighting will use 240W if all inside lights are on full.